For this write up I used my Lichen Angel model. There were a couple of places I wanted to spend more time on, such as cleaning the mesh, but my priority here was documenting the steps. I hope to improve on this workflow.
PART ONE: Zephyr
- Import photoset
- Go through standard workflow steps:
- Alignment/Sparse Cloud
- Dense Cloud
- Mesh (hold off on generating a textured mesh, unless you want to check for accuracy)
- Export mesh, name it _highres. It will be huge tri based mesh. I did not find Zephyr's built in decimation tool helpful. Will use this file later for normal maps.
- CLEAN: I use ZBrush Dynamesh because I want quads. Another option is Meshmixer, but it outputs tris.


I should note, not all retopo is the same. Dynamesh worked for me here because I wanted quads, I wanted speed, and I didn't need specific edgeflow. - DO NOT UNWRAP YET. If more serious repairing/sculpting is required, this step is where that needs to happen. Be careful editing-- if it is too different from the original it may not re-project correctly (try not to alter the main form/silhouette)
- Import back into Zephyr using Import> Import Model. It should plop back in place, right on top of the existing mesh.

About 15k polys. - RClick on Mesh and select Make Structured Mesh. This projects cameras back onto (new) mesh.
- UV UNWRAP: If no issues, return to the exported file from step 4. Unwrap in Zbrush or whatever softwares of choice. I used Zbrush UV master and then tweaked further in Maya Note-- triangle meshes take a stupid long time to unwrap.
- Import the unwrapped model using Import>Import Mesh with UV Map. Because it is identical to the restructured mesh (which was imported in step 4), Zephyr will Generate a Textured Mesh when you hit Import to Workspace. The high res texture will be baked onto the UVs.
- This Textured Mesh is now ready to be exported as both low res OBJ and image file(s).


Footnotes:
Issue: some ZBrush exports have crashed Zephyr on import.
I suspect there is something problematic with the mesh. When opened in Maya there are a hundred separated geo objects. Need to figure out why this only sometimes happens.
Q: What happens if I import a model with UVs at step 4?
A: It will be imported to the Textured Meshes project panel and the textures will look wrong because they are projected incorrectly. Rclick and select Extract Stereo Mesh. This creates a mesh with the same name in the Meshes project panel. Then use that mesh to Generate Textured Mesh.
Essentially, this is stepping backwards and then re baking the textures onto the model.
PART TWO - Substance Painter
*You may want to first import into a 3D package like Maya to prep the file. Center object to the grid, separate geo/shaders.
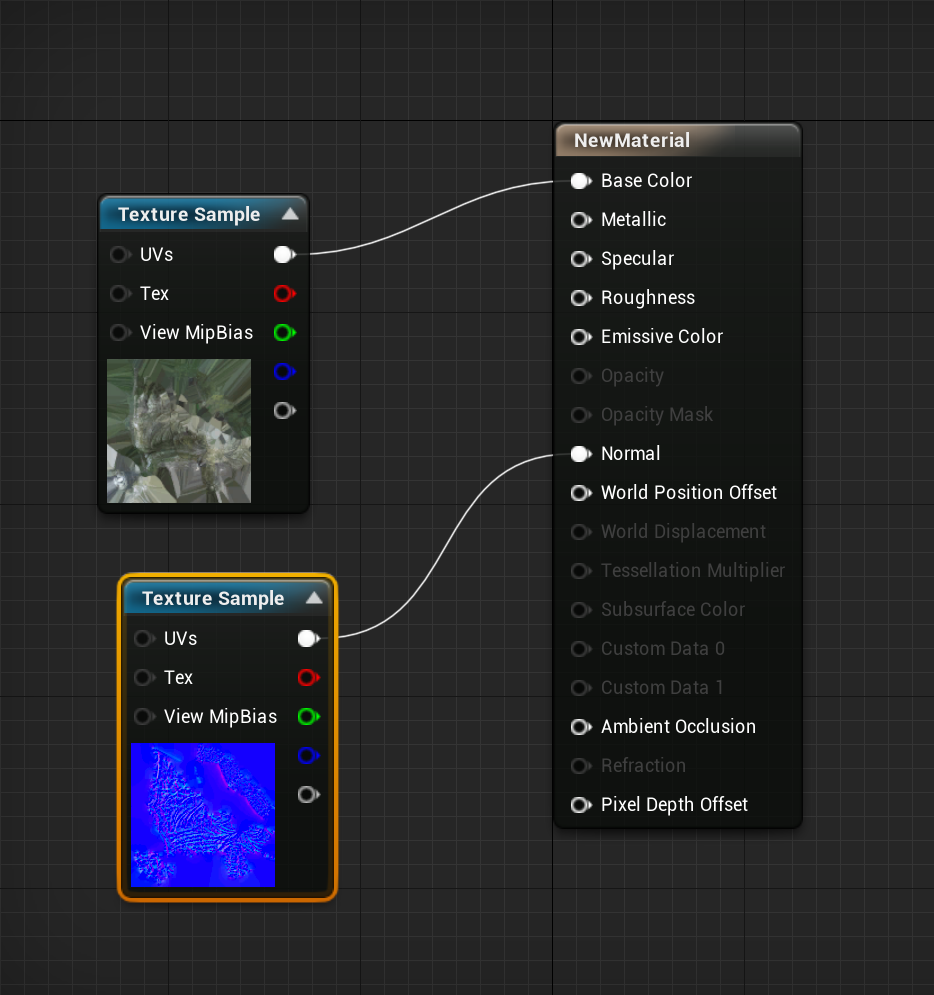
- To generate normal maps and further edit the textures, I use Substance Painter. Start a new project and import the low res obj file from previous step.
Under Texture Set Settings > Bake Mesh Maps, import hi res mesh. Bake all maps (takes a minute).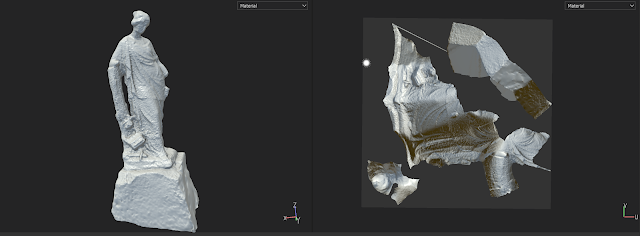
- Import the texture image that was generated from Zephyr.
- New Fill Layer. Uncheck all material properties except color. Under properties, drag the texture onto base color.
- DELIGHT: New Fill Layer. Uncheck all material properties except color. Drag the AO map onto base color. On the layer, add filter "Invert". Set blending mode to Linear Dodge. This is kind of a quick and dirty way to do this, but this takes out a good amount of shadows from the texture.

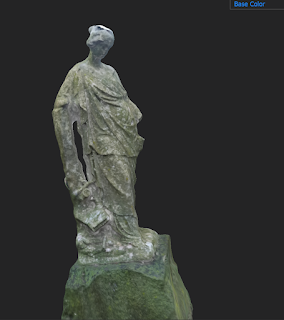
Viewing just the albedo map, second image is delit using my quick method. - Here you could further repair/enhance textures with the powerful Substance tools and shader libraries. You could spent a LOT of time just here on this step, but for this I am going to just acquire the albedo and normal maps.
- Export maps.


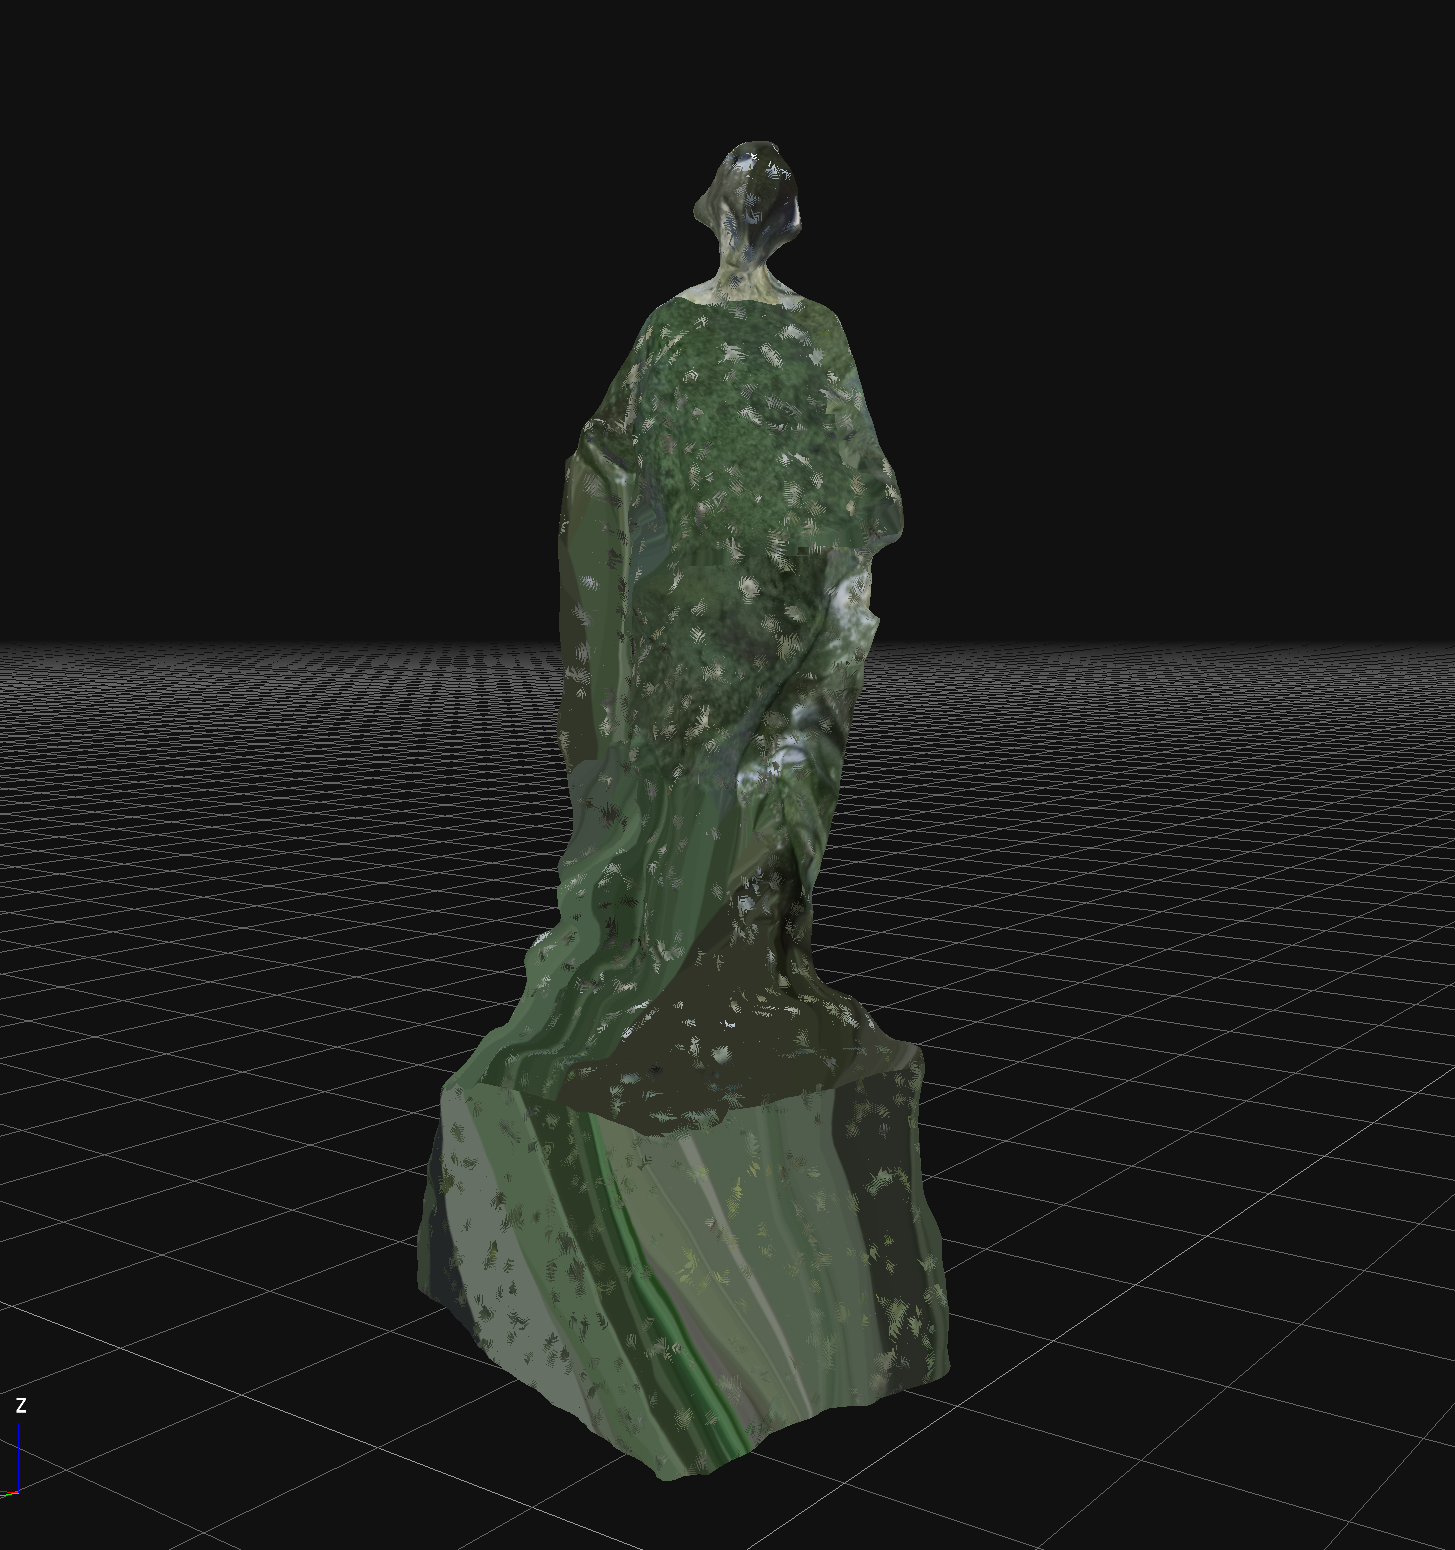
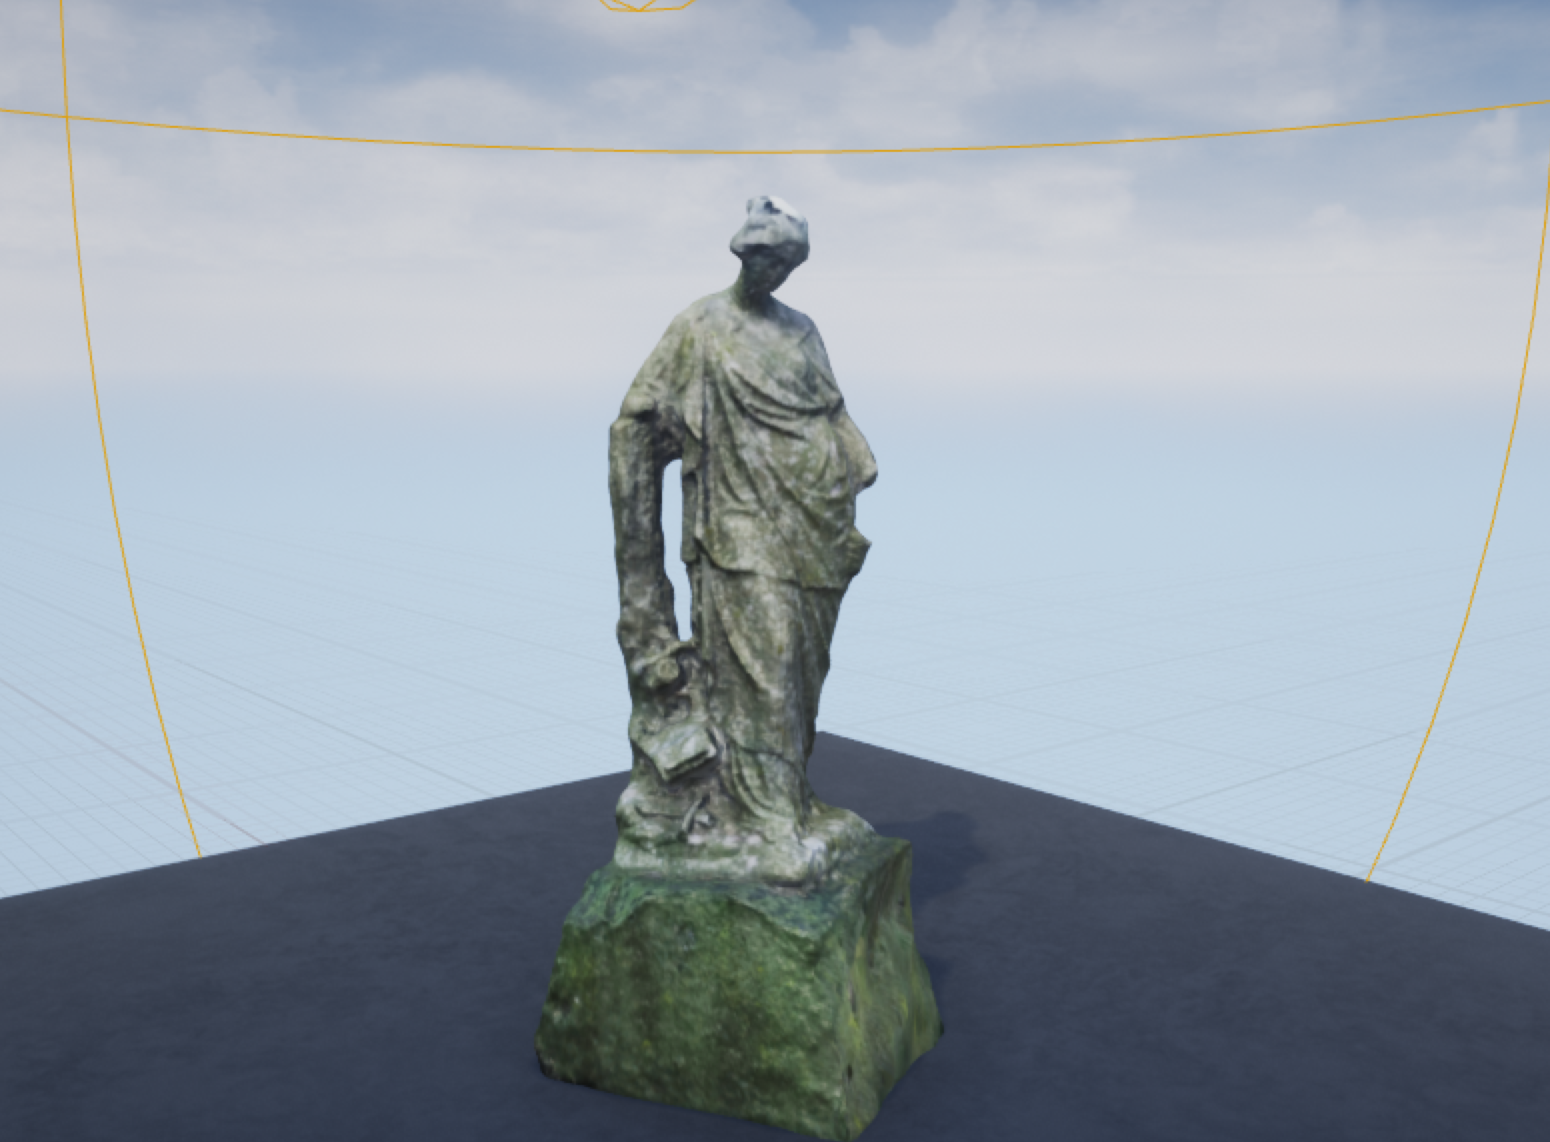
PART THREE - Unreal
Did a quick import to see how she'd look in Unreal.
Concluding thoughts:
Oh man, I would really love to simplify this process. It's annoying (and expensive) to need SO many software packages, especially when I am only using a couple of their features at a time.
Hopefuly by repeating this a few times with other assets I can start to refine, but I also think putting pressure on the 3D scanning software devs to implement realtime workflow tools is a must for the future.


No comments:
Post a Comment